
 AI photo
Milanese Veal Cutlet
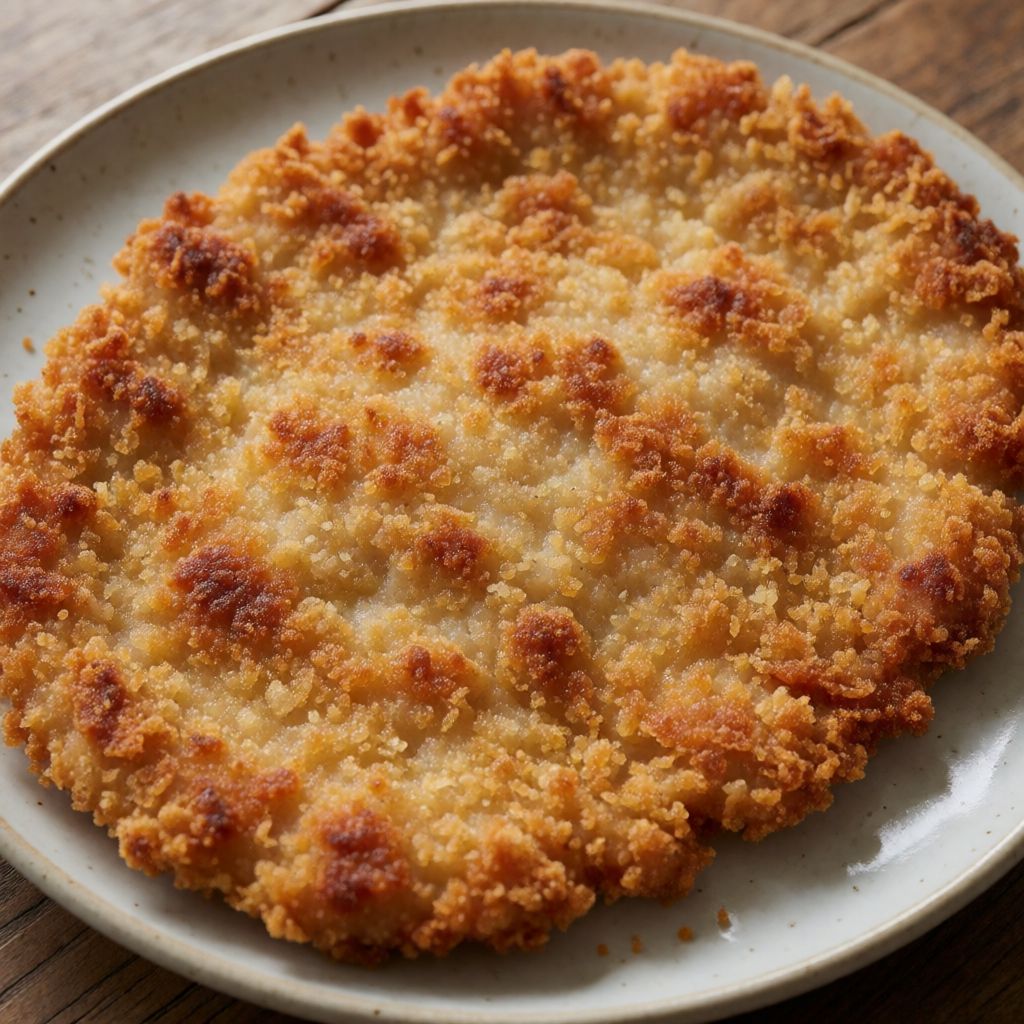
Breaded veal cutlets fried until golden and juicy, a classic Milanese-style dish.
Labels are worked out automatically from the ingredients and can be wrong. Check the packaging if it matters to you.
Ingredients
- 2 pcs Veal 230-250g each
- 2 pcs Eggs
- Breadcrumbs as needed, dried
- 200 g Butter
- Flaky sea salt to taste




Steps
Pat the meat dry with a paper towel and gently pound it with a meat mallet to tenderise.
Coat the cutlets in breadcrumbs, pressing so they stick well.
Dip into beaten eggs, then coat again in breadcrumbs, pressing firmly.
Make shallow criss-cross cuts with the back of a knife, without cutting through the meat.
Melt the butter in a wide frying pan.
Fry the cutlets for about 3 minutes on each side. Doneness: 63°C at the centre (medium).
3 minTurn the cutlets once and place on paper towel to remove excess fat.
Season with flaky sea salt and serve immediately.
What was changed
The clarified butter was replaced with Butter, the frying fat more familiar in British kitchens.
This is a veal cutlet armoured in crumb, fried in butter until the crust goes the colour of a digestive biscuit and the inside stays pink and give-y rather than dry. Whether it works comes down to two things: whether the crust actually stays attached to the meat through the frying, and whether you pull it off the heat before the inside turns from juicy to chalky.
The double coating — crumb, then egg, then crumb again — isn't fussiness. A single dip in egg and crumb gives you a thin shell that shears off the first time you cut into it, because egg alone doesn't have much to grip onto smooth meat. The first dry crumb layer roughens the surface, gives the egg something to key into, and the second crumb layer builds the crust up to a thickness that can actually hold a bite without flaking away into the pan. Some say you need flour first, the way the original Milanese schnitzel does it — no, you don't, because here the first crumb layer is already doing flour's job of giving the wet layer a surface to cling to.
Veal, first. You want a cut that's already tender before the mallet ever touches it — escalope-style, cut from the leg or loin, thin enough that pounding only has to even it out, not break it down. If your butcher counter only has pork escalopes or chicken breast, the mechanism carries over fine: anything lean, pale, and cut thin enough to cook through in minutes without the outside burning first. What changes is the eating — veal has a milkier, less assertive flavour than either, which is exactly why it carries butter and crumb so well without fighting them.
The mallet work has a limit. You're not trying to flatten the cutlet into a doily — you're closing up the natural unevenness in thickness so the whole piece hits 63°C at roughly the same moment, instead of one edge drying out while the thick part is still cool. Pound harder than that and you tear the muscle fibres open, and torn fibres leak juice straight into the pan instead of holding it, which is how you end up with a dry cutlet under a perfect crust — the crust lying to you about what's underneath. Pat the meat dry before any of this starts, for the same reason you'd dry your hands before picking up a hot pan handle: surface water turns to steam against hot fat, and steam pushes the crumb coat away from the meat rather than letting it set against it.
Eggs do one job here — they're glue, wet enough to pick up a second coat of crumb and hold it. Beat them loosely, just enough to break the yolk and white into one liquid; you're not making an omelette.
Breadcrumbs should be dried and fine, not the fresh, soft kind you'd use to pad out a meatball. Fresh crumb holds moisture and steams itself soft in the pan; dried crumb is already most of the way to crisp before it even meets the butter, so frying only has to finish the job. If you haven't got shop breadcrumbs, dry, stale white bread grated or blitzed fine does exactly the same work — the only criterion is that it's dry and even in size, not what brand the bag says.
Butter at this quantity looks generous for two cutlets, and it is — you're not frying in a film of fat, you're shallow-frying in a pool deep enough that the crust gets even contact with hot fat on all sides, the way it would in a kazan's wide, evenly heated base rather than the hot-in-the-middle, cooler-at-the-rim reality of most domestic hobs. A wide frying pan stands in fine for that, as long as it's wide enough that both cutlets lie flat without crowding — crowd them and the fat between cutlets cools, and cool fat is how you get a pale, slightly chewy crust instead of a browned one. If butter's flavour doesn't suit you or you're worried about it catching, you can go to a flavourless oil instead — any fat with no smell of its own, sunflower or a mild vegetable oil — but you lose the nutty note butter gives as it browns, which is most of why this dish uses it in the first place.
The paper towel at the end, and the one you patted the meat dry with at the start, are doing opposite-looking jobs that are actually the same job: controlling how much water and fat sit against that crust. Too much moisture before frying, and the crust goes soft from steam. Too much fat clinging after frying, and the crust goes soft from grease. Salt only at the very end, with something flaky rather than fine — fine salt dissolves into the surface fat and vanishes; flaky salt sits on top and you taste it as a separate crunch each time, which is the only reason to bother with it over the cheap stuff in a shaker. And once it's plated, eat it — a crust left to sit steams itself soft from the inside out as the meat's own heat and moisture work back up through it. Patience earlier, in the pan; none needed, or wanted, at the table.