
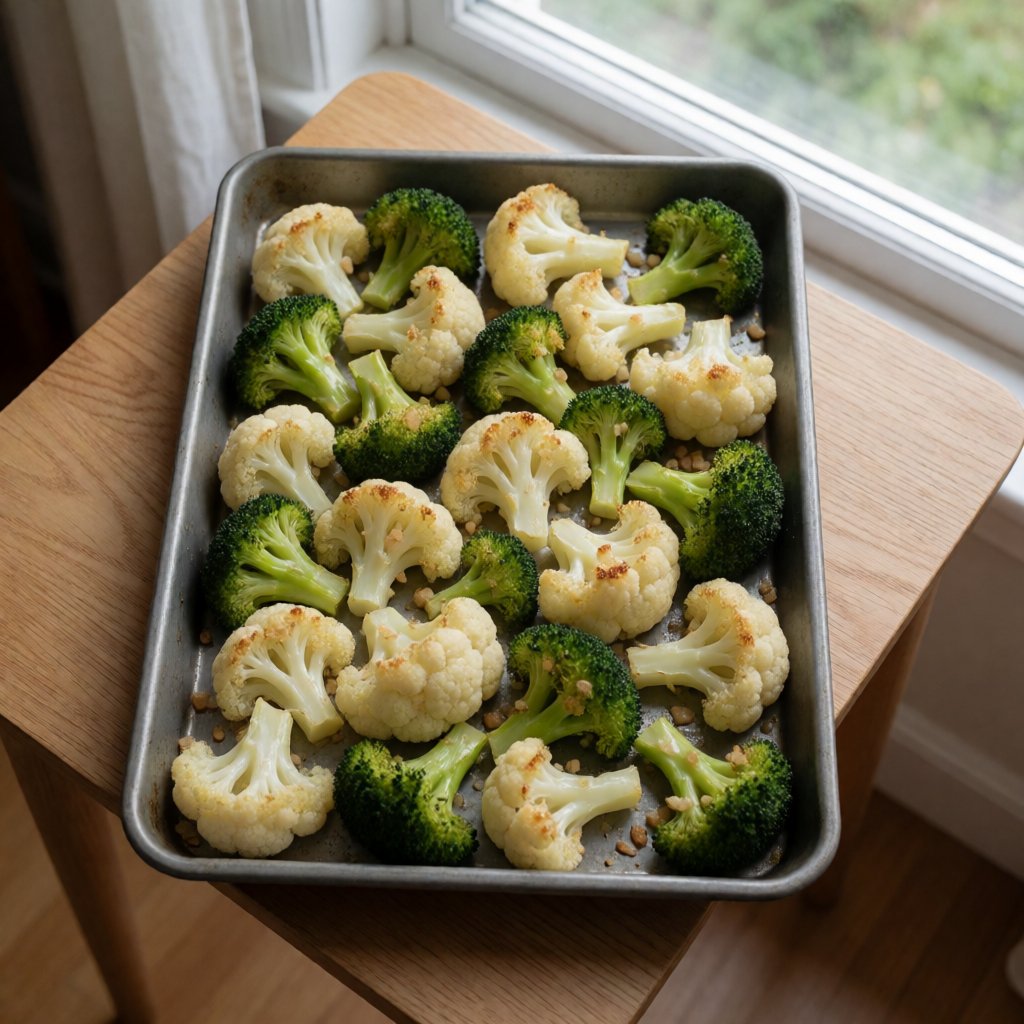
 AI photo
Broccoli and Cauliflower with Garlic
A simple roasted broccoli and cauliflower side with garlic.
Labels are worked out automatically from the ingredients and can be wrong. Check the packaging if it matters to you.
Ingredients
- 250 g broccoli
- 250 g cauliflower
- 2 tbsp sunflower oil
- 2 clove garlic crushed
- 1 pinch salt to taste




Steps
Break the broccoli and cauliflower into florets and pat them dry.
Toss the florets with the oil, salt and crushed garlic, then spread them out on a baking tray.
Roast in an oven preheated to 200°C for 22 minutes.
22 minTake the tray out of the oven and serve.
This isn't boiled veg with a lid on, softened into grey mush the way a lot of British kitchens still do it out of habit from the war years, when boiling was cheap and reliable and nobody worried about colour or crunch. This is roasting — same oven, same tray logic as the Sunday joint, minus the joint. And what decides whether it works has nothing to do with the garlic or the seasoning. It's one thing: heat meeting a dry surface.
Broccoli and cauliflower are mostly water held inside a loose, spongy structure. Wash them — you should, supermarket veg isn't clean — and that water sits on the surface in a film. If that film is still there when the florets hit a hot tray, the first few minutes aren't roasting at all. They're steaming. The water has to boil off before the surface can dry out enough to brown, and by the time it does, the inside's already gone past tender into soft. Patting them dry isn't fuss for its own sake — it's the one step that decides whether you get roasted vegetables or boiled ones that happened to visit an oven.
The same logic runs through spreading them on the tray without crowding. Pile them two layers deep and they trap their own steam between each other, same problem, different cause. Give them room and the air in the oven can actually get at every surface.
Doneness here is a look, not a clock face. The 22 minutes is where to start checking, not where to stop. You want the florets' edges catching colour — brown going toward black at the thin tips — and the stem, when you push a knife tip or fork into it, giving way without resistance. A raw stem still fights you. A stem gone too far has no texture left at all, just give. There's a window of a few minutes between those two states, and it's wider than you'd think, so don't panic over the exact number — your oven runs its own way regardless of the dial, and a fan oven especially tends to run hotter than the number on it suggests. Go by the florets, not the timer.
Broccoli: pick heads that are tight and dark, almost blue-green, with no yellow creeping in — yellow means the flower buds are starting to open, which means the plant's moving past its best and the texture's going woody. The stem isn't waste; peel the tough outer skin off it and it roasts the same as the florets, just cut it a size smaller since it's denser and takes longer to soften.
Cauliflower: go by weight in the hand against its size — a head that feels heavy for how big it looks is packed tight, which means less air, less moisture loss, better roast. Grey patches or soft spots mean it's been sitting; skip it. Cut the florets roughly the same size as your broccoli pieces — not for looks, but so both finish together instead of one burning while the other's still raw.
Oil: the job here is just to carry heat evenly across the surface and stop it scorching dry, plus to give the garlic something to cling to. So any oil with no smell or strong flavour of its own does the work — sunflower, rapeseed, a light (not extra virgin) olive oil. Extra virgin has a low smoke point for this kind of heat and turns bitter under it, so save it for drizzling after, not roasting with.
Garlic: crushed rather than sliced because crushing breaks more of the plant's cells open and gets you more flavour into the oil, faster. The real risk isn't the garlic burning on the vegetable — coated in oil and tucked against the florets, it's insulated. The risk is any stray crushed garlic that lands directly on the bare tray; with nothing between it and the metal, that's what turns black and bitter while the rest is fine. Toss it through properly rather than scattering it loose and you avoid that.
Salt: a pinch, and added before roasting rather than after for a reason — salt pulls a little moisture to the surface by osmosis, same mechanism you're fighting by drying the florets in the first place. So go light at this stage; you can always add more once it's out and tasted, you can't take it back out again. This one's quick, but patience is still the ingredient doing most of the work here — the few minutes spent drying and spreading the vegetables out properly is where the whole dish is decided, long before the oven gets involved.
·