
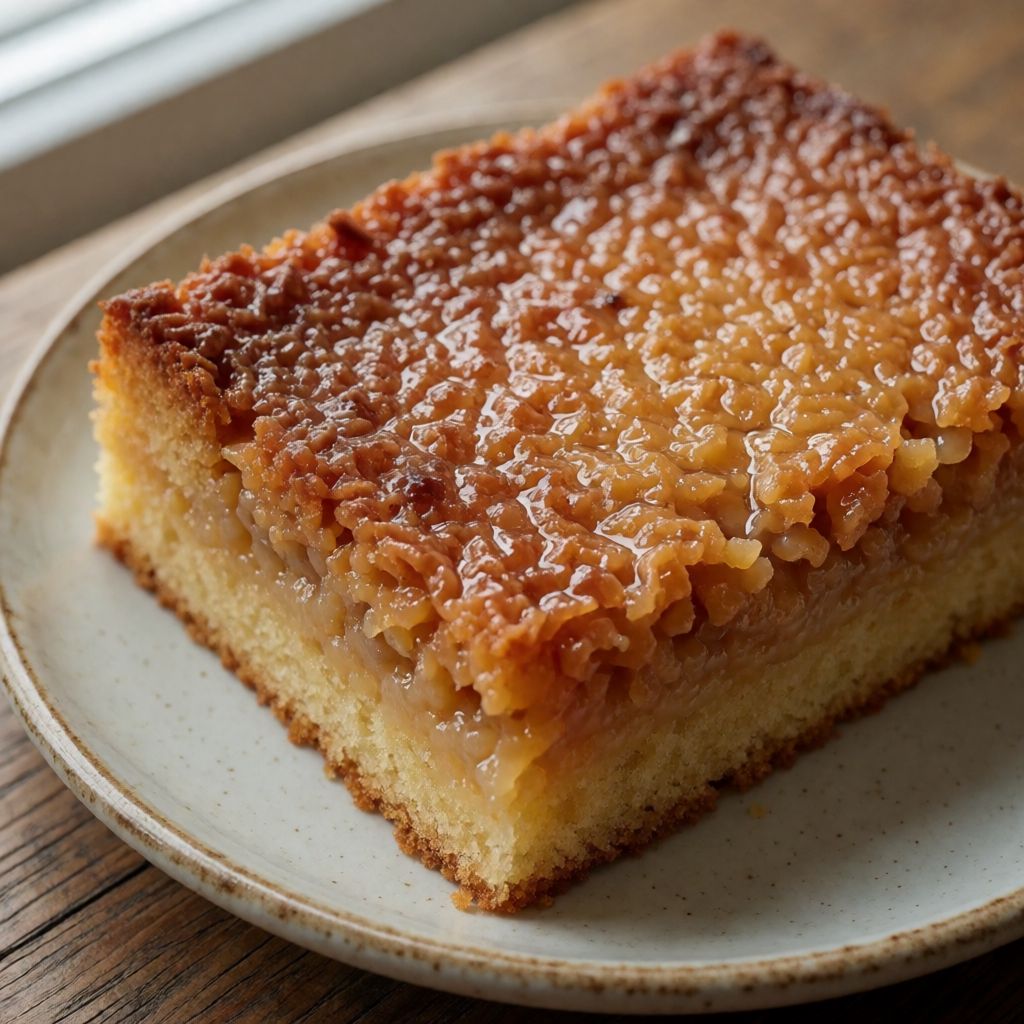
 AI photo
Danish Caramel Cake (Drømmekage)
A soft sponge base topped with a sticky coconut-caramel layer — a dreamy traybake cake.
Labels are worked out automatically from the ingredients and can be wrong. Check the packaging if it matters to you.
Ingredients
- 300 g Caster sugar
- 1 tsp Vanilla sugar
- 4 pcs Eggs
- 280 g Plain flour
- 2 tsp Baking powder
- 70 g Butter
- 200 ml Milk
- 175 g Desiccated coconut
- 150 g Butter
- 100 ml Milk
- 250 g Muscovado sugar brown sugar







Steps
Whisk the sugar, vanilla sugar and eggs until pale and fluffy.
5 minMix the plain flour with the baking powder, sift into the batter and stir well.
3 minCube the butter and heat it in a saucepan together with the milk until the butter melts.
5 minAdd the butter-milk mixture to the batter and pour into a heatproof 24 x 30 cm tin lined with baking paper.
2 minBake the cake for 30 minutes in a fan oven preheated to 175°C, until almost done.
30 minFor the topping, put the desiccated coconut, butter, milk and muscovado sugar in a saucepan, bring to the boil while stirring, and cook until well combined.
5 minRemove from the heat.
Take the cake out of the oven when it is almost done.
Raise the oven temperature to 225°C.
Spread the topping over the cake and return it to the oven.
2 minBake for a further 5 minutes.
5 minLet the cake cool, and it is ready to serve.
Drømmekage means "dream cake" in Danish, and the dream is really about the top two centimetres, not the sponge underneath. The sponge is just a vehicle — a plain, eggy, milk-and-butter batter whose only job is to hold its shape while a caramelised coconut topping sits on it and does something sponge alone never could: go from wet to a thin, chewy, faintly burnt-sugar lid in five minutes flat.
What decides whether this works is timing the two bakes as two separate jobs. The sponge bakes low and slow enough to set without colouring too hard on top — you pull it "almost done," meaning the centre still wobbles faintly if you nudge the tin, because it still has one more spell in the oven ahead of it. Then the oven goes up to a heat that would ruin a sponge but is exactly right for turning sugar and butter into caramel in minutes rather than drying out the cake under it.
Some say you can just bake it once at the high heat the whole way through — no, because the sponge needs a longer, gentler stretch to cook through in the middle, and the topping needs a short, fierce blast to caramelise rather than just melt. Run both on one setting and you get either a raw middle or a topping that's dry sugar glue instead of that wet, dark, slightly sticky skin. Two temperatures, two durations, not out of fussiness but because sugar and batter cook by completely different clocks.
Eggs and sugar whisked first, before anything else touches them, is not a ritual — it's mechanical. Whisking traps air as tiny bubbles stabilised by egg protein, and that air is most of your rise, since this cake has only 2 tsp baking powder doing the rest. Pale and fluffy means the mixture has gone from liquid-yellow to thick and almost white-gold; that colour shift is the air getting beaten in, and it's a better guide than a stopwatch because your arm, your bowl shape and your whisk all beat at different speeds.
The butter-and-milk step — melted together, warm, not boiling — is there so the butter doesn't clump cold through the batter and leave greasy pockets once baked. Warm liquid butter disperses evenly; cold butter just sits in lumps that melt later and leave holes. Any neutral fat with a clean, un-perfumed flavour will stand in here if you're out of butter, though you lose a little richness — a flavourless oil works at a pinch, margarine less well, since it carries more water and less fat than butter does.
The topping is where the real choices live. Muscovado sugar isn't just "brown sugar" cosmetically — it's unrefined, so it carries molasses right through it, giving a deeper, slightly bitter edge that white sugar with golden syrup added can only approximate, not replace. If you haven't got muscovado, dark brown soft sugar is the closest stand-in; light brown works but tastes thinner, more one-note sweet, less burnt-toffee.
Desiccated coconut's job here is structural as much as flavour: it soaks the butter-sugar-milk syrup and gives the topping something to cling to and crisp against, rather than sliding off as a pure caramel glaze would. Finer desiccated coconut toasts and crisps faster under the high heat than coarser flaked coconut, which is why desiccated is specified, not shredded — swap in flaked and you'll want to watch the five minutes closely rather than trust it blindly, since the bigger pieces brown unevenly.
Lining the tin with baking paper isn't fussiness either — this topping boils and bubbles, and some of that caramel will try to find its way under the cake and weld it to the tin. Paper is your insurance against scraping burnt sugar off metal with a knife at 11pm. A loose-bottomed tin without paper will still leak syrup through the seams; line it anyway.
Patience here isn't really about the baking — those times are short and fixed by the recipe, not up to you. It's in the cooling. Caramel topping straight from a 225°C oven is molten, and it sets as it cools, trapping the coconut into that thin crisp-chewy layer people actually associate with the cake. Cut it warm and you get sticky caramel smeared across the sponge rather than a distinct top layer. Let it sit, properly cool, before you touch a knife to it — that's the one step where rushing undoes everything the two ovens just did right.