
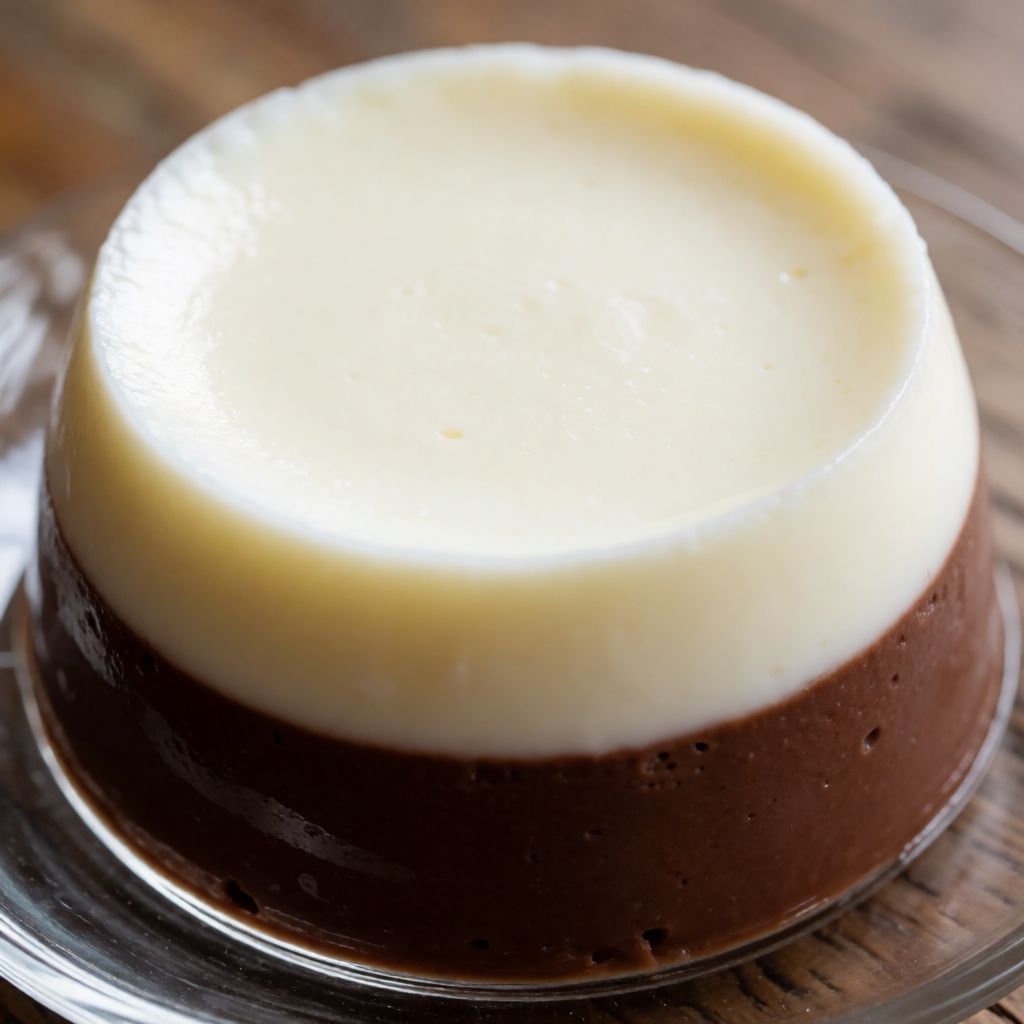
 AI photo
Dark and White Chocolate Panna Cotta
A two-layer panna cotta, dark chocolate below and white chocolate above, chilled until set.
Labels are worked out automatically from the ingredients and can be wrong. Check the packaging if it matters to you.
Ingredients
For the dark chocolate panna cotta
- 2 pcs Gelatine sheets
- 400 ml Whipping cream
- 100 ml Milk
- 40 g Sugar
- 70 g Dark chocolate finely chopped


For the white chocolate panna cotta
- 1 pcs Gelatine sheet
- 0.5 pcs Vanilla pod
- 200 ml Whipping cream
- 50 ml Milk
- 50 g White chocolate finely chopped

Steps
Soak the gelatine in cold water for 10 minutes.
Heat the cream, milk and sugar until almost boiling, but do not let it boil.
Remove the pan from the heat.
Squeeze the water out of the gelatine and stir it into the hot mixture.
Stir well until the gelatine has fully dissolved.
Pour the hot cream mixture over the finely chopped dark chocolate and stir until the chocolate has fully melted.
If you want a panna cotta with a slanted edge, place the glasses on a tray, wrap tightly in a towel and secure the glasses at an angle.
Carefully pour the dark chocolate cream into the glasses and chill in the fridge for 4 hours.
Soak the gelatine in cold water for 10 minutes.
Scrape the seeds from the vanilla pod, add them to a pan with the cream and milk and heat until almost boiling.
Remove the pan from the heat.
Squeeze the water out of the gelatine and stir it into the hot vanilla cream.
Stir well until the gelatine has fully dissolved.
Pour the cream mixture over the finely chopped white chocolate and stir until the chocolate has fully melted.
Let the cream cool to room temperature, then stir.
Carefully pour the cream into the glasses on top of the dark chocolate panna cotta and chill in the fridge for at least 3 hours before serving.
This is two panna cottas stacked in one glass, not one recipe wearing two colours. Dark chocolate cream goes in first and has to set hard enough to hold its own weight before the white layer lands on top of it — that's the whole mechanism, and it's why the recipe makes you wait four hours before touching it again. Rush that and you don't get a clean line, you get marbling, which looks accidental rather than deliberate.
What decides whether it works is restraint with heat, twice over. Cream, milk and sugar go on until "almost boiling" — meaning small bubbles creeping up the edge of the pan, a skin starting to shiver on the surface — and then off the heat. Actually boiling scorches the proteins in the cream and you get a grainy set instead of a silken one; it also drives off the gentle sweetness you're trying to keep. The chocolate never sees the stove at all — it melts from the heat already stored in the liquid, which is gentler and means you can't scorch it by accident.
Gelatine is the structural ingredient here, chocolate is the flavour, and cream is the medium — three different jobs, and the recipe fails if you confuse them. Two sheets for 500ml of dark mixture, one sheet for 250ml of white — proportionally about the same ratio, because a looser set would slump when you tip the glass at an angle, and a firmer one would eat like jelly rather than cream.
Gelatine sheets first, because what you do with them prevents the one real failure in this dish: grainy or lumpy set. Soaking in cold water for ten minutes isn't fussiness — it lets the sheets hydrate evenly so that when you squeeze them out and drop them into hot (not boiling) liquid, they dissolve smoothly instead of leaving little rubbery threads. If you only have powdered gelatine, the rule is the same logic, different form: bloom it in a few spoons of cold water first, then melt it into the hot cream off the heat. Never add it straight to boiling liquid — gelatine's setting power breaks down above a certain heat, so "almost boiling" isn't a texture instruction, it's a protection for the gelatine itself.
Whipping cream carries the fat that makes panna cotta feel like panna cotta rather than a flavoured jelly — somewhere around 35–40% fat is what you want on the tub, because lower-fat cream sets thinner and tastes thinner too. The milk cuts that richness so the dessert doesn't sit like a brick after a Sunday roast; it's not there for any structural reason, just balance. If you've only got single cream in the fridge, don't substitute it for the double — it hasn't got the fat to carry the set, and you'll end up with something closer to a milk pudding.
Dark chocolate, finely chopped, melts from residual heat in the cream rather than direct heat — that's the whole reason it's chopped fine and not left in chunks: more surface area means it's fully melted before the cream cools below the point where it'll dissolve easily. Use a chocolate you'd eat on its own; 60–70% cocoa solids is a reasonable range — much higher and the bitterness fights the cream, much lower and you're really just adding sugar. White chocolate works by the same mechanism but behaves differently in the pan: it's mostly cocoa butter and sugar with no cocoa solids to speak of, so it melts faster and scorches more easily, which is exactly why that layer gets poured over it rather than simmered with it at all.
The vanilla pod in the white layer is doing a job the dark layer doesn't need — white chocolate is a quieter, sweeter flavour with nothing to push against it, so the vanilla gives it a backbone. Scraping the seeds rather than just dropping the whole pod in means you get the flavour distributed through the cream, not just steeped in one spot. No pod in the cupboard — a good vanilla extract, added once the cream's off the heat so it doesn't cook off, covers the same ground.
The two different chilling windows — four hours, then three more — aren't arbitrary. The first is a genuine wait: the dark layer needs to be firm enough on the surface to carry the white one without the two melting into each other, and in a domestic fridge, running colder and slower than any blast chiller, that's a real four hours, not an optional one. The second stage is shorter because the white layer is thinner and setting on top of something already cold, which gives it a head start. Patience is the one ingredient this recipe can't survive without — not flour, not timing to the minute, just leaving it alone in the fridge and finding something else to do with your afternoon.
Some say panna cotta needs to be turned out of a mould to count as proper panna cotta — no, because that tradition comes from restaurants wanting a sculptural plate, not from the dessert itself. Set in a glass and eaten with a spoon, it's the same dish, arguably an easier one for a kitchen that doesn't have matching moulds lying around, and nobody's Sunday is worse for it.